Hosting on shared servers
From public to public_html
- On shared hosting servers (e.g. sinners.be), the default folder for your website is probably not named public, but public_html
- With the steps described below, you can reconfigure your Laravel application to use the folder public_html instead of public
Rename the public folder
- Rename the public folder to public_html
Update homestead
- Stop Vagrant:
vagrant halt - Open C:\vagrant\homestead\Homestead.yaml and change, under
sites:, the public folder of your project to public_html.
E.g. for vinyl_shop.test:
-   map: vinyl_shop.test
    to: /home/vagrant/code/vinyl_shop/public_html
1
2
2
- Start Vagrant with provisioning:
vagrant up --provision
Modify Laravel files
- Open public_html/index.php and add some code to overwrite the default public path
$app = require_once __DIR__.'/../bootstrap/app.php';
// overwrite the default public path with the path of the current folder
$app->bind('path.public', function() {
    return __DIR__;
});
1
2
3
4
5
2
3
4
5
- Open bootstrap/app.php and fix the path for Artisan scripts
$app = new Illuminate\Foundation\Application(
    $_ENV['APP_BASE_PATH'] ?? dirname(__DIR__)
);
// fix path for Artisan scripts
$app->bind('path.public', function() {
    return base_path().'/public_html';
});
1
2
3
4
5
6
7
2
3
4
5
6
7
Modify Laravel mix
- Open webpack.mix.js
- Set the public path to public_html
- Change the output path for
mix.js()to js and formix.sass()to css
mix.setPublicPath('public_html');

mix.js('resources/js/app.js', 'js')
    .sass('resources/sass/app.scss', 'css');
1
2
3
4
2
3
4
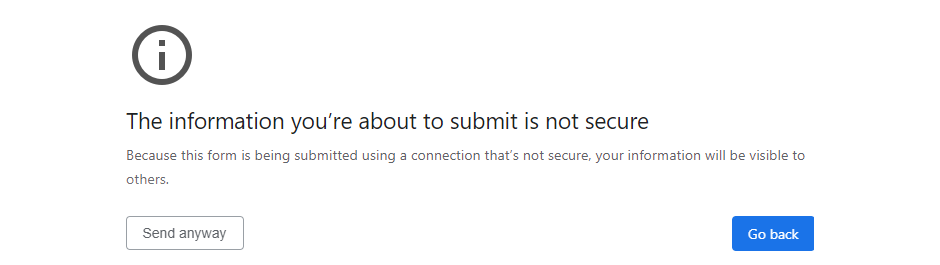
Solve the mixed content issue
- Mixed content occurs when a webpage is loaded over a secure HTTPS connection, but other resources are loaded over an insecure HTTP connection
- Recently, browsers started checking whether there is no mixed content (i.e. both
https://andhttp://) on webpages
- Recently, browsers started checking whether there is no mixed content (i.e. both
- Without any extra precautions, also Laravel suffers from this issue, e.g. on the login page/form:

- Open app/Providers/AppServiceProvider.php
- Add the following code to force all routes in production mode to use HTTPS
public function boot()
{
    if (App::environment('production')) {
        URL::forceScheme('https');
    }
}
1
2
3
4
5
6
2
3
4
5
6
Put your website online
Recompile your assets for production
- The assets app.css and app.js are not production ready and should be minified/optimized using the command
npm run prod.
See also Config -> Laravel Mix -> Recompile for production.
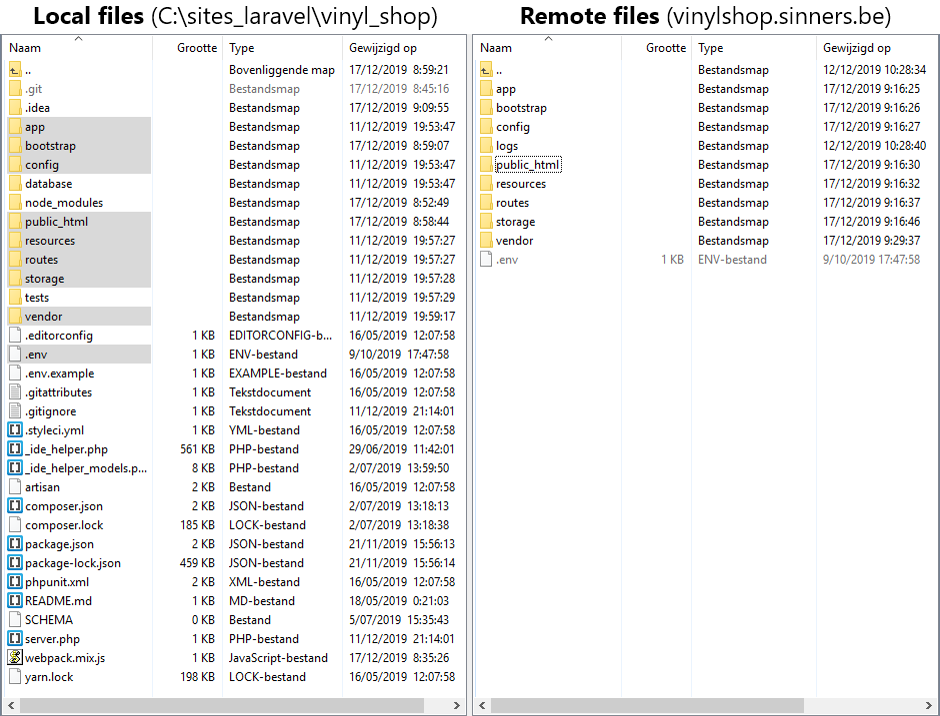
Upload the files to your hosting provider
- Upload all folders, except .git, .idea, database, node_modules and tests
- Upload only the file .env
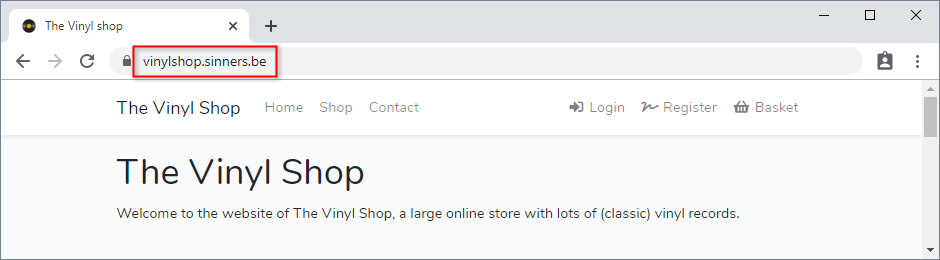
- Test the homepage of your online application
REMARK
If your online application (e.g. on sinners.be) results in an error, you can replace the content of the (remote) file public_html/.htaccess with this code:
Options +FollowSymLinks
RewriteEngine On

RewriteCond %{REQUEST_FILENAME} !-d
RewriteCond %{REQUEST_FILENAME} !-f
RewriteRule ^ index.php [L]
1
2
3
4
5
6
2
3
4
5
6
Update the remote .env file
- Upodate the REMOTE (not the local!) .env file
APP_NAME="The Vinyl Shop"
APP_ENV=production
APP_KEY=base64:e77jPGGcqZ4sNADHI5f/icC+LFnBw34hpRJKSf2ftnI=
APP_DEBUG=false
APP_URL=https://vinylshop.sinners.be
1
2
3
4
5
2
3
4
5
- By setting
APP_DEBUG=false, visitors will get a 500 | Server Error (instead of detailed error information) if something goes wrong
TIP
Set the variable APP_DEBUG TEMPORARILY to true if you need to solve errors in your production environment (as then more info on the errors will be shown, just as in your local development environment)
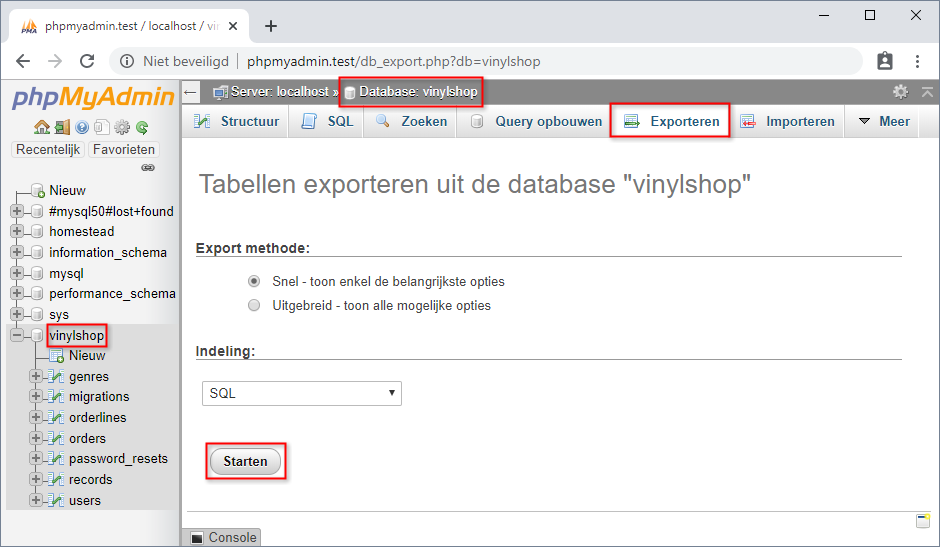
Export/import the vinylshop database
- Open http://phpmyadmin.test/ (or http://homestead.test/phpmyadmin/)
- Click on the vinylshop database, go to the tab "Exporteren" and click on "Starten"
- Save the file vinylshop.sql to your desktop
- Create a new database on your hosting
- Open your remote phpMyAdmin
- "Importeer" (= the tab next to "Exporteren") vinylshop.sql (in your newly created database on your remote phpMyAdmin)
- Open the REMOTE .env file and update all
DB_...variables- E.g. for sinners.be, the values of the
DB_...variables can be found at the database page of the Sin Control panel:
- E.g. for sinners.be, the values of the
DB_CONNECTION=mysql
DB_HOST=db.sinners.be
DB_PORT=3306                  # NOT port 33060 like in Homestead!
DB_DATABASE=xxxxx_vinylshop
DB_USERNAME=xxxxx
DB_PASSWORD=xxxxx
1
2
3
4
5
6
2
3
4
5
6
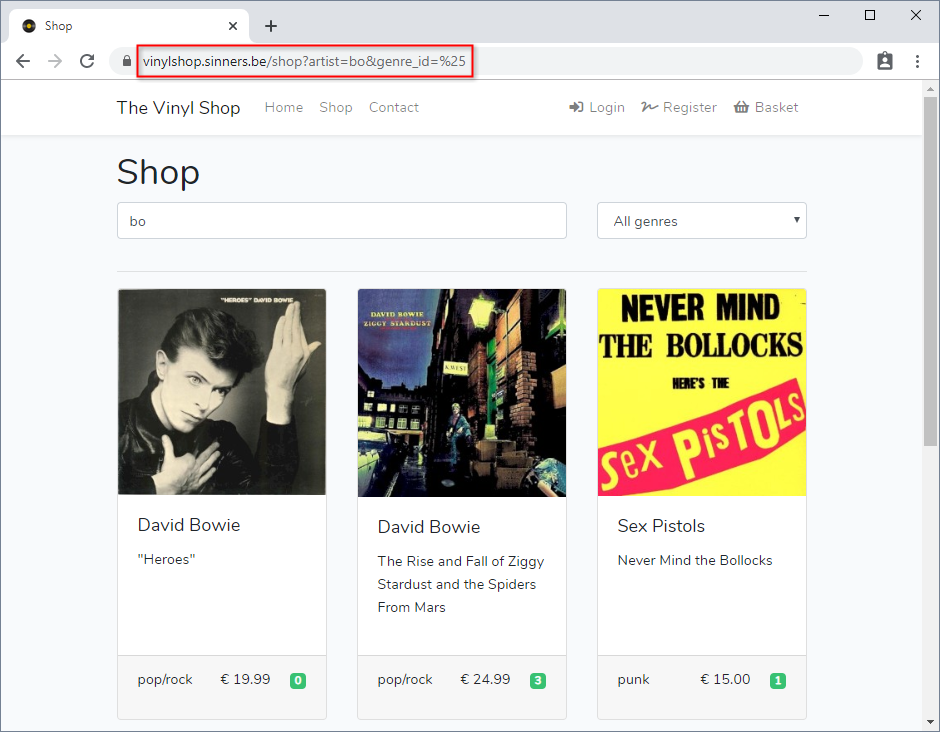
- Open one of the pages relying on the database (e.g. the shop master page) to test the remote database connection
Configure a real mail server
TIP
- From now on it's best to use REAL mail addresses (to send your mail from), as fake sender mail addresses (like @example.com or @mailinator.com) will probably show up in your spam folder
- Your application (contact page, reset password page) needs a real outgoing mail server (SMTP server) to send out the emails. You have different options to establish this:
- Use the SMTP server from your hosting provider
- All paid hosting solutions have there own SMTP server(s)
- Open the REMOTE .env file and update all
MAIL_...variables, as specified in your control panel
- Use your Office365 SMTP server
- Open the REMOTE .env file and update all
MAIL_...variables
- Open the REMOTE .env file and update all
MAIL_MAILER=smtp
MAIL_HOST=smtp.office365.com
MAIL_PORT=587
MAIL_USERNAME=sxxxxxxx@student.thomasmore.be           # office365 login account
MAIL_PASSWORD=xxxxx                                    # office365 password
MAIL_FROM_ADDRESS=name.surname@student.thomasmore.be   # office365 mail address
MAIL_FROM_NAME="The Vinyl Shop"
MAIL_ENCRYPTION=tls
1
2
3
4
5
6
7
8
2
3
4
5
6
7
8
REMARK
- If you use the Office365 SMTP server, the from address MUST be your Office365 mail address!
- Because of this limitation, you also have to refactor the (@thevinylshop.com) from address to your Office365 mail address in the Mailable class app/Mail/ContactMail.php
- Use your Gmail SMTP server
- Limited to 500 emails a day
- If you have a Gmail-account, you can use the following
MAIL_...variables in the REMOTE .env file
MAIL_MAILER=smtp
MAIL_HOST=smtp.gmail.com
MAIL_PORT=587
MAIL_USERNAME=xxxxx@gmail.com       # your gmail address
MAIL_PASSWORD=xxxxx                 # your gmail password
MAIL_FROM_ADDRESS=xxxxx@gmail.com   # your gmail address
MAIL_FROM_NAME="The Vinyl Shop"
MAIL_ENCRYPTION=tls
1
2
3
4
5
6
7
8
2
3
4
5
6
7
8
REMARKS
- Unless your Google account is configured with 2-factor authentication (2-step verification), you have to (TEMPORARILY) allow less secure apps to access your Google account
- Possibly, you also need to unlock the captcha in order to be able to login from your application
Updates and maintenance
- A Laravel application is a never ending story ...
- When you add/update a file (Blade view, controller, ...), upload them individually to your remote host
- When you delete a file, don't forget to delete the file from your remote host as well
- When you update resources/js/vinylShop.js or resources/sass/app.scss, don't forget to upload the COMPILED files public_html/js/app.js and public_html/css/app.css
IMPORTANT: Don't forget to recompile your assets for production before uploading! - When you update your composer packages (with
composer update), it's best to delete the whole external vendor folder and upload it again