Hosting on shared servers
From public to public_html
- On shared hosting servers (e.g. sinners.be), the default folder for your website is probably not named public, but public_html
- With the steps described below, you can reconfigure your Laravel application to use the folder public_html instead of public
Rename the public folder
- Rename the public folder to public_html
Update homestead
- Stop Vagrant:
vagrant halt - Open C:\vagrant\homestead\Homestead.yaml and change, under
sites:, the public folder of your project to public_html.
E.g. for vinyl_shop.test:
-   map: vinyl_shop.test
    to: /home/vagrant/code/vinyl_shop/public_html
1
2
2
- Start Vagrant with provisioning:
vagrant up --provision
Modify Laravel files
- Open public_html/index.php and add some code to overwrite the default public path
$app = require_once __DIR__.'/../bootstrap/app.php';
// overwrite the default public path with the path of the current folder
$app->bind('path.public', function() {
    return __DIR__;
});
1
2
3
4
5
2
3
4
5
- Open bootstrap/app.php and fix the path for Artisan scripts
$app = new Illuminate\Foundation\Application(
    $_ENV['APP_BASE_PATH'] ?? dirname(__DIR__)
);
// fix path for Artisan scripts
$app->bind('path.public', function() {
    return base_path().'/public_html';
});
1
2
3
4
5
6
7
2
3
4
5
6
7
Modify Laravel mix
- Open webpack.mix.js
- Set the public path to public_html
- Change the output path for
mix.js()to js and formix.sass()to css
mix.setPublicPath('public_html');

mix.js('resources/js/app.js', 'js')
    .sass('resources/sass/app.scss', 'css');
1
2
3
4
2
3
4
Put your website online
Recompile your assets for production
- The assets app.css and app.js are not production ready and should be minified/optimized using the command
npm run prod.
See also Config -> Laravel Mix -> Recompile for production.
Upload the files to your hosting provider
- Upload all folders, except .git, .idea, database, node_modules and tests
- Upload only the file .env
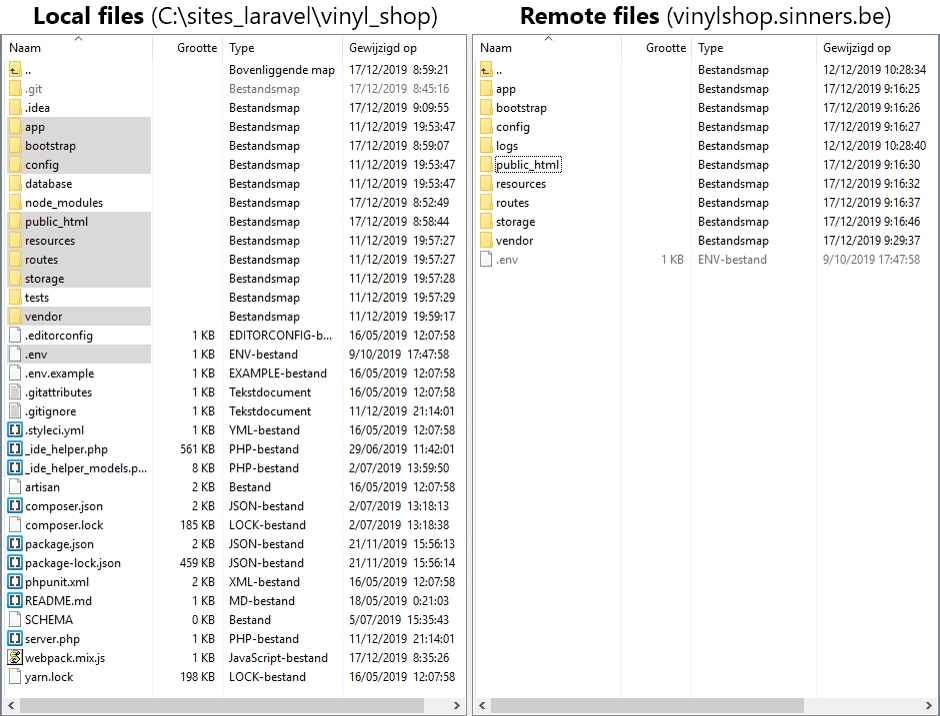
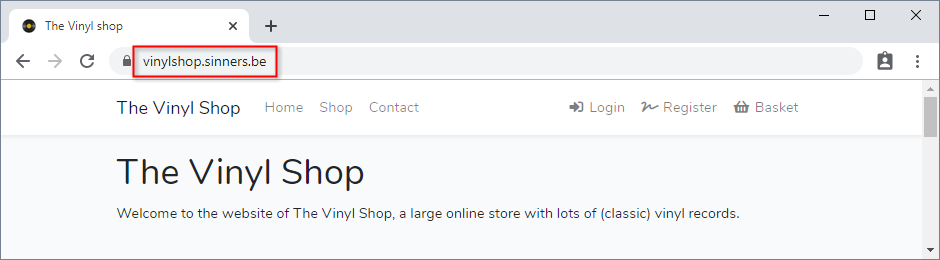
- Test the homepage of your online application
REMARK
If your online application (e.g. on sinners.be) results in an error, you can replace the content of the (remote) file public_html/.htaccess with this code:
Options +FollowSymLinks
RewriteEngine On

RewriteCond %{REQUEST_FILENAME} !-d
RewriteCond %{REQUEST_FILENAME} !-f
RewriteRule ^ index.php [L]
1
2
3
4
5
6
2
3
4
5
6
Disable debug mode
- It's best practice to disable debug mode on a live webserver
- Open the REMOTE (not the local!) .env file and set
APP_DEBUG=false
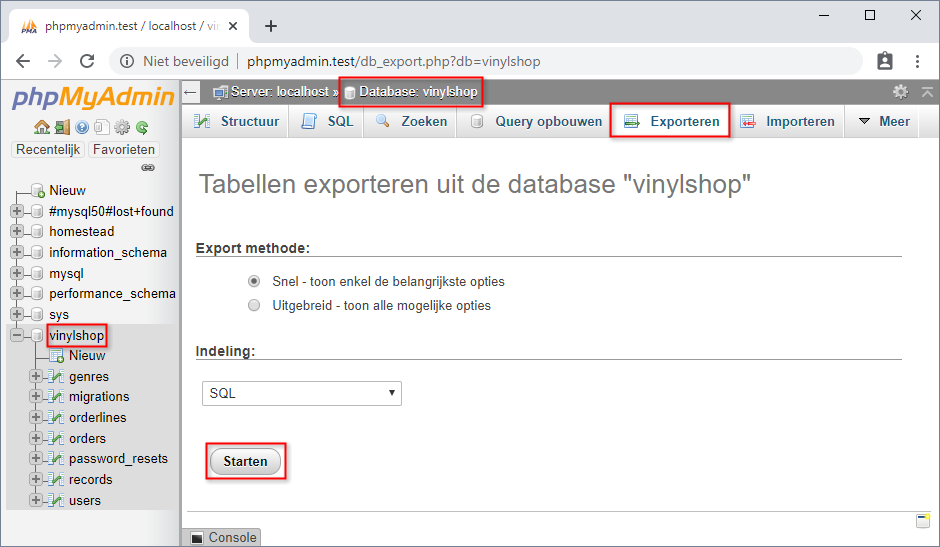
Export/import the vinylshop database
- Open http://phpmyadmin.test/ (or http://homestead.test/phpmyadmin/)
- Click on the vinylshop database, go to the tab "Exporteren" and click on "Starten"
- Save the file vinylshop.sql to your desktop
- Create a new database on your hosting
- Open your remote phpMyAdmin
- "Importeer" (= the tab next to "Exporteren") vinylshop.sql (in your newly created database on your remote phpMyAdmin)
- Open the REMOTE .env file and update all
DB_...variables- E.g. for sinners.be, the values of the
DB_...variables can be found at the database page of the Sin Control panel:
- E.g. for sinners.be, the values of the
DB_CONNECTION=mysql
DB_HOST=db.sinners.be
DB_PORT=3306                  # NOT port 33060 like in Homestead!
DB_DATABASE=xxxxx_vinylshop
DB_USERNAME=xxxxx
DB_PASSWORD=xxxxx
1
2
3
4
5
6
2
3
4
5
6
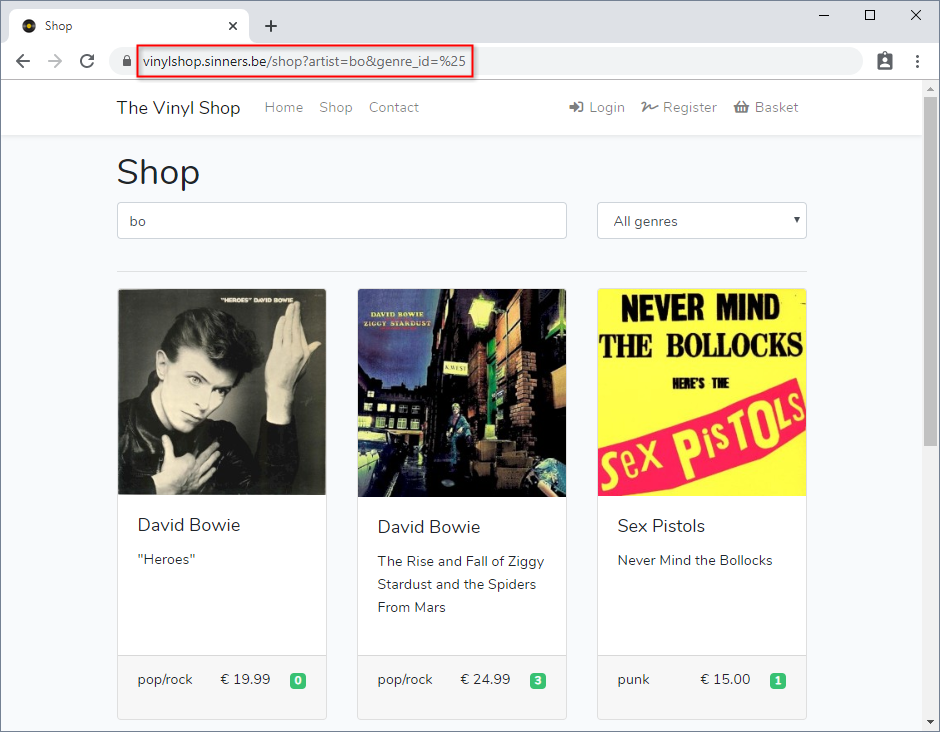
- Open one of the pages relying on the database (e.g. the shop master page) to test the remote database connection
Configure a real mail server
TIP
- From now on it's best to use REAL mail addresses (to send your mail from), as fake sender mail addresses (like @example.com or @mailinator.com) will probably show up in your spam folder
- First, open the REMOTE .env file and update the
APP_URLvariable with the real URL (as this URL is used e.g. in the header of the sent mails) - Next, your application (contact page, reset password page) needs a real outgoing mail server (SMTP server) to send out the emails. You have different options to establish this:
- Use the SMTP server from your hosting provider
- All paid hosting solutions have there own SMTP server(s)
- Open the REMOTE .env file and update all
MAIL_...variables, as specified in your control panel
- Use your Office365 SMTP server
- Open the REMOTE .env file and update all
MAIL_...variables
- Open the REMOTE .env file and update all
MAIL_DRIVER=smtp
MAIL_HOST=smtp.office365.com
MAIL_PORT=587
MAIL_USERNAME=sxxxxxxx@student.thomasmore.be           # office365 login account
MAIL_PASSWORD=xxxxx                                    # office365 password
MAIL_FROM_ADDRESS=name.surname@student.thomasmore.be   # office365 mail address
MAIL_FROM_NAME="Name Surname"                          # doesn't matter, as your office365 name will be used
1
2
3
4
5
6
7
2
3
4
5
6
7
REMARK
- If you use the Office365 SMTP server, the from address MUST be your Office 365 mail address!
- Because of this limitation, you have to refactor the (@thevinylshop.com) from address of the contact form
- Use your Gmail SMTP server
- Limited to 500 emails a day
- If you have a Gmail-account, you can use the following
MAIL_...variables in the REMOTE .env file
MAIL_DRIVER=smtp
MAIL_HOST=smtp.gmail.com
MAIL_PORT=587
MAIL_USERNAME=xxxxx@gmail.com       # your gmail address
MAIL_PASSWORD=xxxxx                 # your gmail password
MAIL_FROM_ADDRESS=xxxxx@gmail.com   # any real mail address is ok, but your gmail address will be used
MAIL_FROM_NAME="Name Surname"
1
2
3
4
5
6
7
2
3
4
5
6
7
REMARK
- Unless your Google account is configured with 2-factor authentication (2-step verification), you have to (TEMPORARILY) allow less secure apps to access your Google account
- Use a (free) cloud-based SMTP provider like Sendgrid
- Create a new (free) account on SendGrid
- A free SendGrid account is limited to 100 emails a day
- Login to your account and go to the Integration guide
- Choose SMTP relay and create a new API Key
IMPORTANT: your code behind this API key will only show once (at creation time), so copy it to a save place! - You can edit the API key settings on the left side under settings -> API Keys
- Open the REMOTE .env file and update all
MAIL_...variables
- Create a new (free) account on SendGrid
MAIL_DRIVER=smtp
MAIL_HOST=smtp.sendgrid.net
MAIL_PORT=587
MAIL_USERNAME=apikey
MAIL_PASSWORD=xxxxxx                                   # the code behind your API key
MAIL_FROM_ADDRESS=name.surname@student.thomasmore.be   # any real mail address is ok
MAIL_FROM_NAME="Name Surname"
1
2
3
4
5
6
7
2
3
4
5
6
7
Updates and maintenance
- A Laravel application is a never ending story ...
- When you add/update a file (Blade view, controller, ...), upload them individually to your remote host
- When you delete a file, don't forget to delete the file from your remote host as well
- When you update resources/js/vinylShop.js or resources/sass/app.scss, don't forget to upload the COMPILED files public_html/js/app.js and public_html/css/app.css
IMPORTANT: Don't forget to recompile your assets for production before uploading! - When you update your composer packages (with
composer update), it's best to delete the whole external vendor folder and upload it again