Contact
- A contact form is a very common element on every website
Refactor routes
- At the moment, our contact page only contains some static text
- First, we refactor it using a controller
- Run the command:
php artisan make:controller ContactUsController
- Run the command:
- Open app/Http/Controllers/ContactUsController.php and add two methods
- The method
show()shows the contact form - The method
sendEmail()sends a confirmation mail (with the content of the submitted form) to the user, with a carbon copy to The Vinyl Shop administration- For now, this method only redirects (GET request!) to the 'contact-us' route, and thus, shows the form again
- The method
class ContactUsController extends Controller
{
    // Show the contact form
    public function show()
    {
        return view('contact');
    }

    // Send email
    public function sendEmail(Request $request)
    {
         // Flash filled-in form values to the session

        // Validate $request

        // Send email

        // Flash a success message to the session

        // Redirect to the contact-us link ( NOT to view('contact')!!! )
        return redirect('contact-us');      // or return back();
    }
}
2
3
4
5
6
7
8
9
10
11
12
13
14
15
16
17
18
19
20
21
22
23
- We also provide two (new) 'contact-us' routes
- A GET route for showing the contact form
- A POST route for sending the email
- Open routes/web.php and replace
Route::view('contact-us', 'contact');
with
Route::get('contact-us', 'ContactUsController@show');
Route::post('contact-us', 'ContactUsController@sendEmail');
2
REMARK
Using the previous "setup" we will comply to the Post/Redirect/Get (PRG) design pattern, preventing duplicate contact form submissions and the (probably well-known) pop-up

when the page is reloaded
Contact form
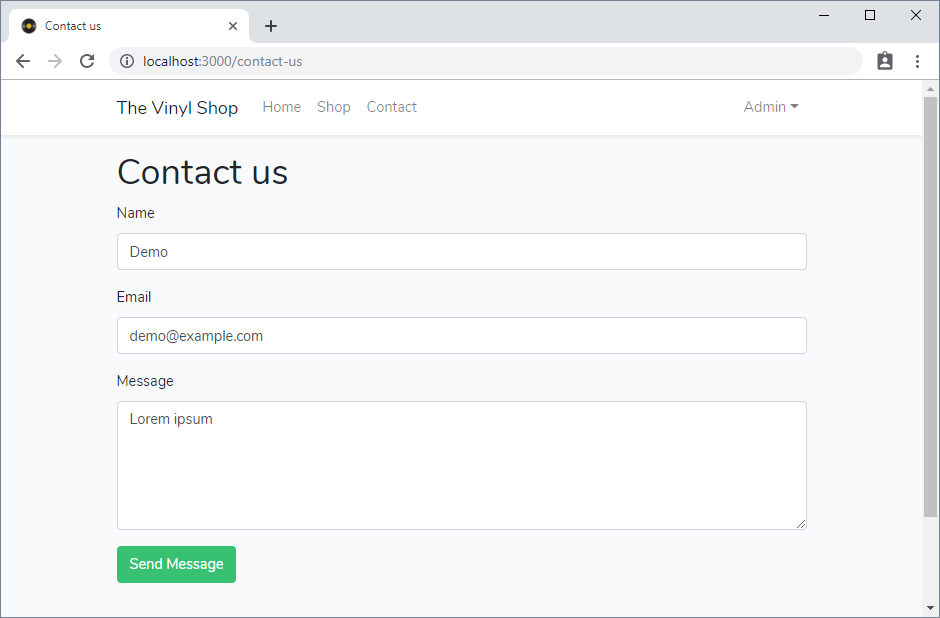
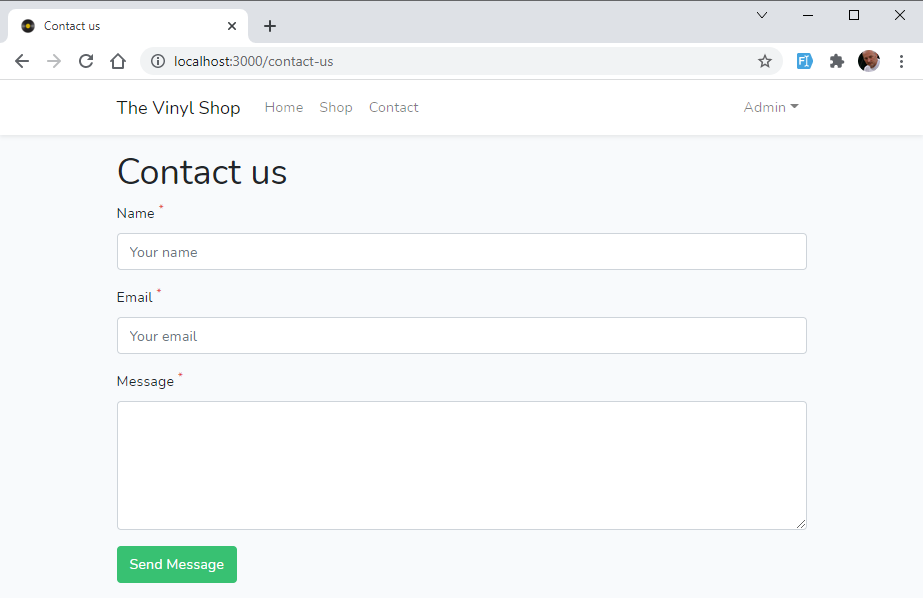
- Open resources/views/contact.blade.php and add a contact form with client side validation to the page
@section('main')
    <h1>Contact us</h1>
    <form action="/contact-us" method="post">
        <div class="form-group">
            <label for="name">Name</label>
            <input type="text" name="name" id="name"
                   class="form-control"
                   placeholder="Your name"
                   required
                   value="">
        </div>
        <div class="form-group">
            <label for="email">Email</label>
            <input type="email" name="email" id="email"
                   class="form-control"
                   placeholder="Your email"
                   required
                   value="">
        </div>
        <div class="form-group">
            <label for="message">Message</label>
            <textarea name="message" id="message" rows="5"
                      class="form-control"
                      placeholder="Your message"
                      required
                      minlength="10"></textarea>
        </div>
        <button type="submit" class="btn btn-success">Send Message</button>
    </form>
@endsection
2
3
4
5
6
7
8
9
10
11
12
13
14
15
16
17
18
19
20
21
22
23
24
25
26
27
28
29
30

CSRF protection
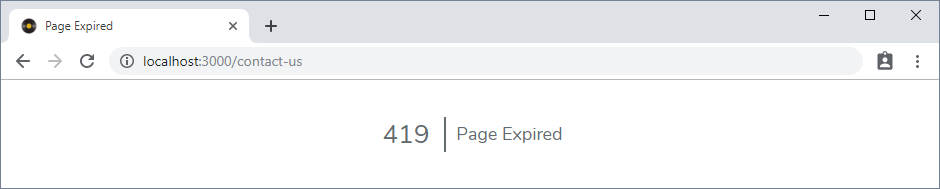
- If you test/submit the form, you get a 419 | Page Expired error, because Laravel automatically protects your application from cross-site request forgery (CSRF) attacks
- Laravel generates a "token" for each active user session
- When you submit a form (with a POST request), Laravel checks whether this token corresponds to the mandatory token of the form
- Add a CSRF token to the form using the
@csrfBlade directive, which injects a hidden field (check the source code in the browser)
<form action="/contact-us" method="post">
    @csrf
    ...
</form>
2
3
4
Remember the filled-in values
- After submitting the form (nothing happens at this moment), you'll be redirected to the form page, but the filled-in form values are gone
- We cannot use the
request()helper function to retrieve these filled-in form values from the current request (as we did for the search form in Shop: master page), because we are redirected (a new GET request!) to the 'contact-us' route at the end of thesendMail()method - The
flash()method will flash the (current) input to the session so that it is available during the user's next request- Add
$request->flash()just before the redirect
- Add
class ContactUsController extends Controller
{
    //Show the contact form
    public function show() { ... }

    // Send email
    public function sendEmail(Request $request)
    {
        // Flash filled-in form values to the session
        $request->flash();

        // Validate $request

        // Send email

        // Flash a success message to the session

        // Redirect to the contact-us link ( NOT to view('contact')!!! )
        return redirect('contact-us');
    }
}
2
3
4
5
6
7
8
9
10
11
12
13
14
15
16
17
18
19
20
21
- Update the form values to their previous state using Laravel's helper function
old()
@section('main')
    <h1>Contact us</h1>
    <form action="/contact-us" method="post">
        @csrf
        <div class="form-group">
            <label for="name">Name</label>
            <input type="text" name="name" id="name"
                   class="form-control"
                   placeholder="Your name"
                   required
                   value="{{ old('name') }}">
        </div>
        <div class="form-group">
            <label for="email">Email</label>
            <input type="email" name="email" id="email"
                   class="form-control"
                   placeholder="Your email"
                   required
                   value="{{ old('email') }}">
        </div>
        <div class="form-group">
            <label for="message">Message</label>
            <textarea name="message" id="message" rows="5"
                      class="form-control"
                      placeholder="Your message"
                      required
                      minlength="10">{{ old('message') }}</textarea>
        </div>
        <button type="submit" class="btn btn-success">Send Message</button>
    </form>
@endsection
2
3
4
5
6
7
8
9
10
11
12
13
14
15
16
17
18
19
20
21
22
23
24
25
26
27
28
29
30
31
- Resubmit the form (to witness that the filled-in values are now restored)
REMARK
You may add a second argument to the old() function call, which will be used (as default value) if no "old" value is available. Handy when testing the contact form, as you do not have to enter all values again after reloading the page!
{{ old('name', 'Demo') }}
{{ old('email', 'demo@example.com') }}
{{ old('message', "New message\nLorem ipsum") }}
2
3
TIP
Install the Fake Filler browser extension to quickly fill all inputs on a page with fake/dummy data
Send feedback to the user
- After submitting the form, we'll send some feedback to the user
- In analogy with sending the filled-in form values to the session, we use the
flash()method to send some feedback
Flash a session variable 'success'
- Add an extra line of code to send ("flash") the session variable
'success'to the next request
public function sendEmail(Request $request)
  {
      // Flash filled-in form values to the session
      $request->flash();

      // Validate $request

      // Send email

      // Flash a success message to the session
      session()->flash('success', 'Thank you for your message.<br>We\'ll contact you as soon as possible.');
      // Redirect to the contact-us link ( NOT to view('contact')!!! )
      return redirect('contact-us');
  }
2
3
4
5
6
7
8
9
10
11
12
13
14
REMARKS
- There are two popular methods to "flash" a message to a redirect
- With
session()->flash('key','value')
- With
session()->flash('success', 'Thank you ...');
return redirect('contact-us');
2
2. Via with('key','value') on the redirect
return redirect('contact-us')->with('success', 'Thank you ...');
session()is a helper function that returns the current session object, on which the (non-static)flash()method can be called:session()->flash('success', 'Thank you ...').- As an alternative, the corresponding facade
Sessioncould be used with a static method call
(Session::flash('success', 'Thank you ...')). - The disadvantage of the latter approach is that you have to include (manually or using autocompletion) the import statement
use Illuminate\Support\Facades\Sessionoruse Session.
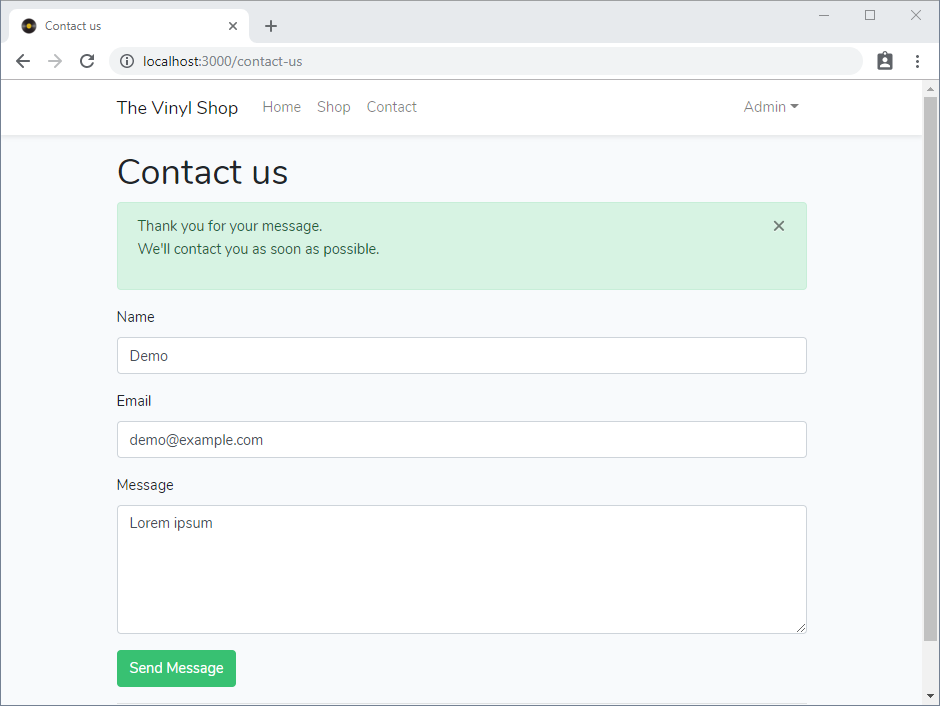
Show session variable 'success' in the view
- Add a Bootstrap alert to the view
- Line 2: show the alert if the session has a variable
'success' - Line 7: get the value of the session variable
'success'and show it inside the alert
- Line 2: show the alert if the session has a variable
<h1>Contact us</h1>
@if (session()->has('success'))
    <div class="alert alert-success alert-dismissible fade show">
        <button type="button" class="close" data-dismiss="alert" aria-label="Close">
            <span aria-hidden="true">×</span>
        </button>
        <p>{!! session()->get('success') !!}</p>
    </div>
@endif
2
3
4
5
6
7
8
9
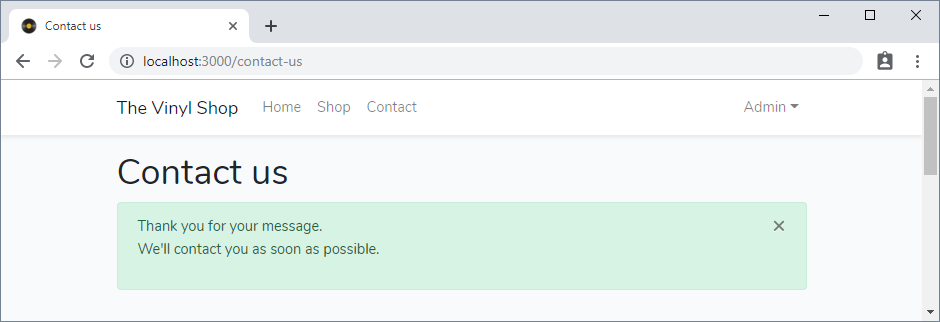
Hide form
- If the form is correctly submitted (and the success alert is shown), there is no need to show the (completed) form (again)
- Therefore, show the form (only) if the session has NO variable
'success'
<h1>Contact us</h1>
@if (session()->has('success'))
    <div class="alert alert-success alert-dismissible fade show">
        ...
    </div>
@endif
@if (!session()->has('success'))
    <form action="/contact-us" method="post">
        ...
    </form>
@endif
2
3
4
5
6
7
8
9
10
11
Refactor the flash message for re-use
- We'll use the
flash()method more than once inside this application to show a success alert, so it's advisable to move the code to a new (shared) file resources/views/shared/alert.blade.php - Add an extra alert with an
alert-dangerclass that will be shown when there is a session variable'danger'
{{-- session key = success --}}
@if (session()->has('success'))
    <div class="alert alert-success alert-dismissible fade show">
        <button type="button" class="close" data-dismiss="alert" aria-label="Close">
            <span aria-hidden="true">×</span>
        </button>
        <p>{!! session()->get('success') !!}</p>
    </div>
@endif

{{-- session key = danger --}}
@if (session()->has('danger'))
    <div class="alert alert-danger alert-dismissible fade show">
        <button type="button" class="close" data-dismiss="alert" aria-label="Close">
            <span aria-hidden="true">×</span>
        </button>
        <p>{!! session()->get('danger') !!}</p>
    </div>
@endif

{{-- session key = primary --}}
@if (session()->has('primary'))
    <div class="alert alert-primary alert-dismissible fade show">
        <button type="button" class="close" data-dismiss="alert" aria-label="Close">
            <span aria-hidden="true">×</span>
        </button>
        <p>{!! session()->get('primary') !!}</p>
    </div>
@endif
2
3
4
5
6
7
8
9
10
11
12
13
14
15
16
17
18
19
20
21
22
23
24
25
26
27
28
29
- Replace, inside the view, the alert box with the include file alert.blade.php
<h1>Contact us</h1>
@include('shared.alert')
@if (!session()->has('success'))
    <form action="/contact-us" method="post">
        ...
    </form>
@endif
2
3
4
5
6
7
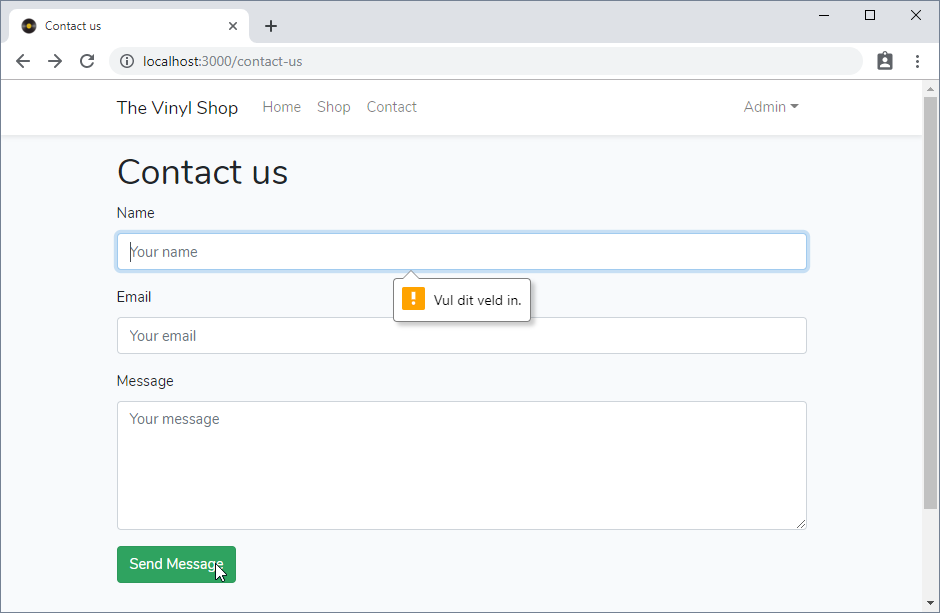
Form validation
- At this point, our form has only some basic client side validation that comes with HTML5
- All form input fields are
requiredand the message must be at least 10 characters long
- All form input fields are
WARNING
Client side validation is not enough, you also need to validate the input on the server side!
- To check the server side validation, we temporarily disable the client side validation by adding the
novalidateattribute to theformtag
<form action="/contact-us" method="post" novalidate>
    ...
</form>
2
3
Validation logic inside the controller
- If you need some validation inside the controller, the method
validate()always comes first inside the method - If the validation fails, the user will automatically be redirected to the previous page
- A global variable
$errorsis sent (with the redirect) - Also the old values are automatically sent with the redirect, so the
$request->flash()statement can be removed
- A global variable
- Add some validation rules to the page
- List of available validation rules
- If the validation succeeds, the rest of the code in the
sendMail()method is executed
public function sendEmail(Request $request)
{
  // Flash filled-in form values to the session
  $request->flash();

  // Validate $request
  $this->validate($request,[
    'name' => 'required',
    'email' => 'required|email',
    'message' => 'required|min:10'
  ]);
  ...
}
2
3
4
5
6
7
8
9
10
11
12
13
TIP
You can comment (or delete) the line $request->flash(); because the validator automatically flashes the old values back to the view
public function sendEmail(Request $request)
{
  // Flash filled-in form values to the session
  // $request->flash();

  // Validate $request
  $this->validate($request,[
    'name' => 'required',
    'email' => 'required|email',
    'message' => 'required|min:10'
  ]);
  ...
}
2
3
4
5
6
7
8
9
10
11
12
13
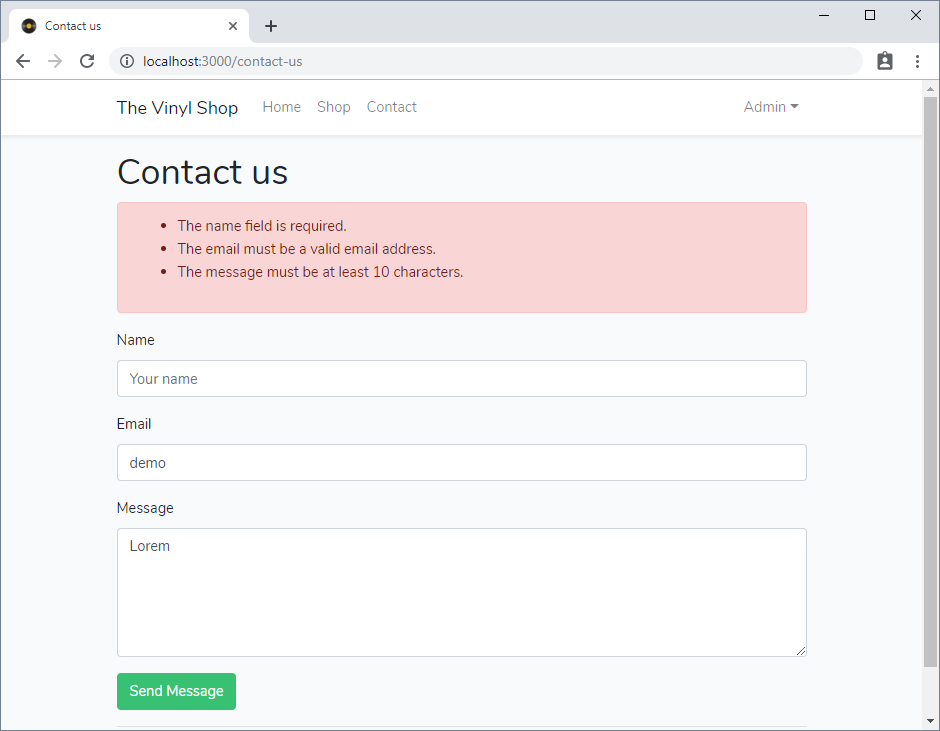
Display all validation errors
- The statement
$errors->all()returns all error messages as an array of strings
["The name field is required.","The email must be a valid email address.",
 "The message must be at least 10 characters."]
2
- To display all errors (in an alert) on the view, you have to loop over this array
- First, check whether there are any errors using the statement
$errors->any()
- First, check whether there are any errors using the statement
<h1>Contact us</h1>
@include('shared.alert')
@if ($errors->any())
    <div class="alert alert-danger">
        <ul>
            @foreach ($errors->all() as $error)
                <li>{{ $error }}</li>
            @endforeach
        </ul>
    </div>
@endif
2
3
4
5
6
7
8
9
10
11
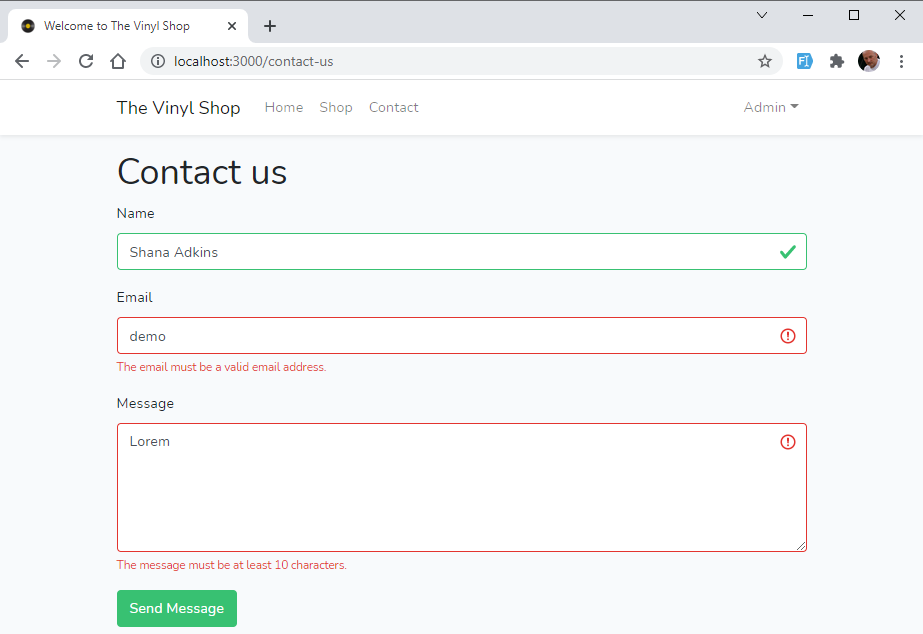
Display validation errors individually
- The statement
$errors->first('name')returns the first error message for the input field 'name' as a string
"The name field is required."
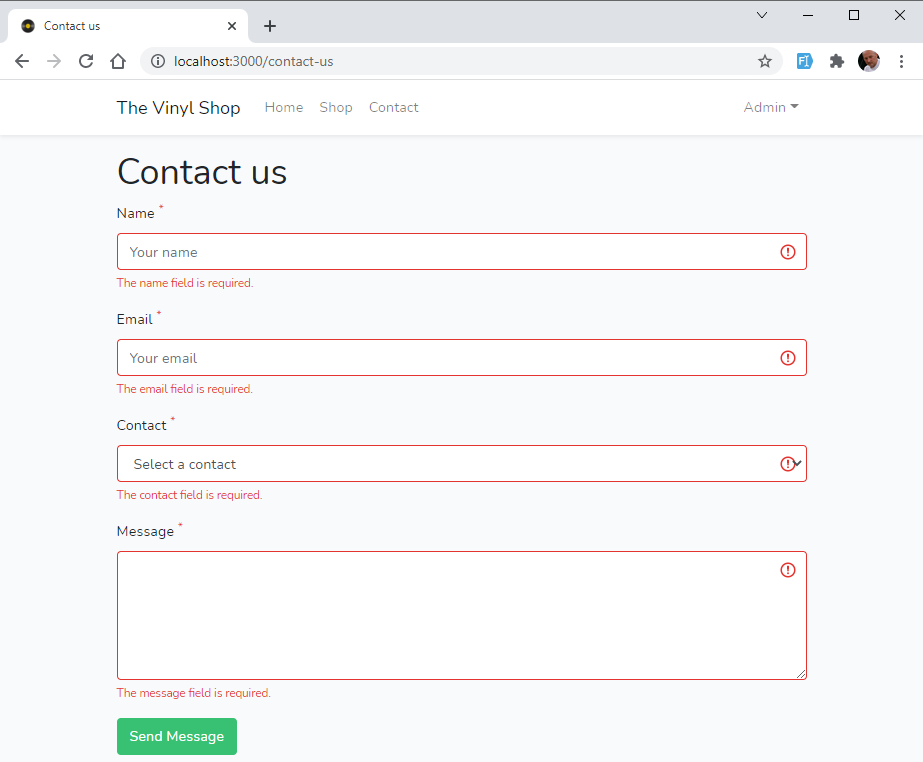
- Add the individual errors on the form input fields (resulting in more sophisticated feedback)
- Remove the global validation error block
- Add a class
is-invalidto each input field with an error - Add a
divwith classinvalid-feedbackright after every input field
<form action="/contact-us" method="post" novalidate>
    @csrf
    <div class="form-group">
        <label for="name">Name</label>
        <input type="text" name="name" id="name"
               class="form-control {{ $errors->any() ? ($errors->first('name') ? 'is-invalid' : 'is-valid') : '' }}"
               placeholder="Your name"
               required
               value="{{ old('name') }}">
        <div class="invalid-feedback">{{ $errors->first('name') }}</div>
    </div>
    <div class="form-group">
        <label for="email">Email</label>
        <input type="email" name="email" id="email"
               class="form-control {{ $errors->any() ? ($errors->first('email') ? 'is-invalid' : 'is-valid') : '' }}"
               placeholder="Your email"
               required
               value="{{ old('email') }}">
        <div class="invalid-feedback">{{ $errors->first('email') }}</div>
    </div>
    <div class="form-group">
        <label for="message">Message</label>
        <textarea name="message" id="message" rows="5"
                  class="form-control {{ $errors->any() ? ($errors->first('message') ? 'is-invalid' : 'is-valid') : '' }}"
                  required
                  minlength="10">{{ old('message') }}</textarea>
        <div class="invalid-feedback">{{ $errors->first('message') }}</div>
    </div>
    <button type="submit" class="btn btn-success">Send Message</button>
</form>
2
3
4
5
6
7
8
9
10
11
12
13
14
15
16
17
18
19
20
21
22
23
24
25
26
27
28
29
30
Sending email
- After configuring our mail settings, we set up a mail template, pass some data to this template and send the mail itself
Configure mail settings
- Configure the .env file to send emails within the application through mailtrap.io, as described in Config -> .env file -> MAIL_...
Create mailable
- In Laravel, each type of email sent by your application is represented as a mailable class
- To create a new Markdown mailable class
ContactMailwith a Markdown Blade template email/contact.blade.php, use the commandphp artisan make:mail ContactMail --markdown email.contact- The corresponding file ContactMail.php with the mailable class definition is stored in the app/Mail folder
- Besides a Markdown-based mail template (used in this site), you can also opt for HTML or text-based templates for the mail
- Send an email via the controller
- Make a new instance
$emailof theContactMailmailable class - Add the recipient using the
to()method (on theMailfacade)- If you supply an object (in our case
$request) which containsemail(andname) properties, these will be automatically used
- If you supply an object (in our case
- Send the mail using the
send()method with$emailas parameter
- Make a new instance
public function sendEmail(Request $request)
{
    // Validate $request
    ...

    // Send email
    $email = new ContactMail();
    // return $email;       // uncomment this line to display the result in the browser
    Mail::to($request)      // or Mail::to($request->email, $request->name)
        ->send($email);

    // Flash a success message to the session
    session()->flash('success', 'Thanks for you message.<br>We\'ll contact you as soon as possible.');
    // Redirect to the contact-us link ( NOT to view('contact')!!! )
    return redirect('contact-us');
}
2
3
4
5
6
7
8
9
10
11
12
13
14
15
16
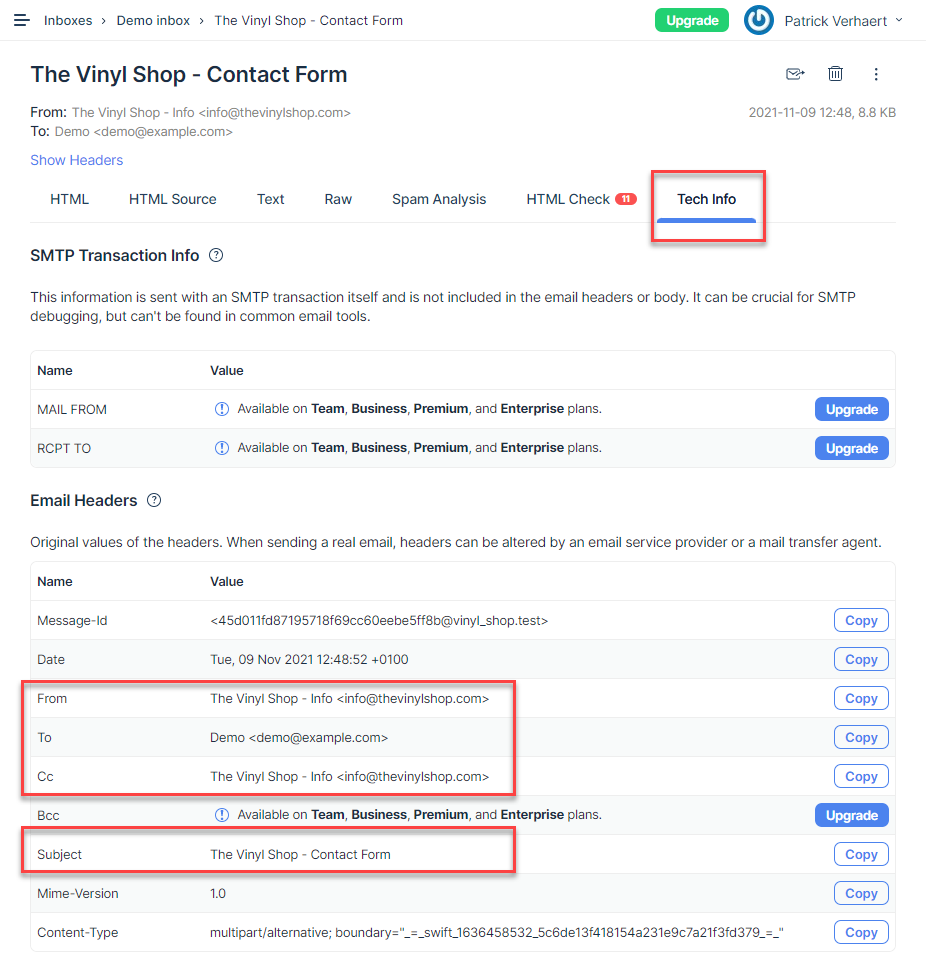
- Submit a form and check if the mail is in your Mailtrap inbox
- For now, a default mail with the from address
from@example.com(as specified in the .env file) and some fixed text is sent as we still have to send the real data to the mail body
- For now, a default mail with the from address

REMARK
You can return the new mail-instance to check the mail body inside the browser
$email = new ContactMail();
return $email;
2
Inject the data to the mailable
- Pass the validated form data (i.e., the object
$request) to the mailable
$email = new ContactMail($request);
- Open the mailable app/Mail/ContactMail.php
- Make a new
publicproperty (e.g.$request) - Get the validated form data through the constructor and bind it to the
$requestproperty- As this
$requestproperty ispublic, it will be available in the mail template
- As this
- Inside the
build()method- The path to the mail template is used as a parameter of the
markdown()method - Add the from and carbon copy addresses and a subject to the mailable using the
from(),cc()andsubject()methods
- The path to the mail template is used as a parameter of the
class ContactMail extends Mailable
{
    use Queueable, SerializesModels;

    public $request;

    /** Create a new message instance. ...*/
    public function __construct($request)
    {
        $this->request = $request;
    }

    /** Build the message. ...*/
    public function build()
    {
        return $this->from('info@thevinylshop.com', 'The Vinyl Shop - Info')
            ->cc('info@thevinylshop.com', 'The Vinyl Shop - Info')
            ->subject('The Vinyl Shop - Contact Form')
            ->markdown('email.contact');
    }
}
2
3
4
5
6
7
8
9
10
11
12
13
14
15
16
17
18
19
20
21
Update the mail template
- Make the following changes in the .env file (as these variables are used in the header/footer and signature in the mail template)
- change the
APP_NAMEto "The Vinyl Shop" (with quotes!) - change
APP_URLto http://localhost:3000
- change the
APP_NAME="The Vinyl Shop"
...
APP_URL=http://localhost:3000
2
3
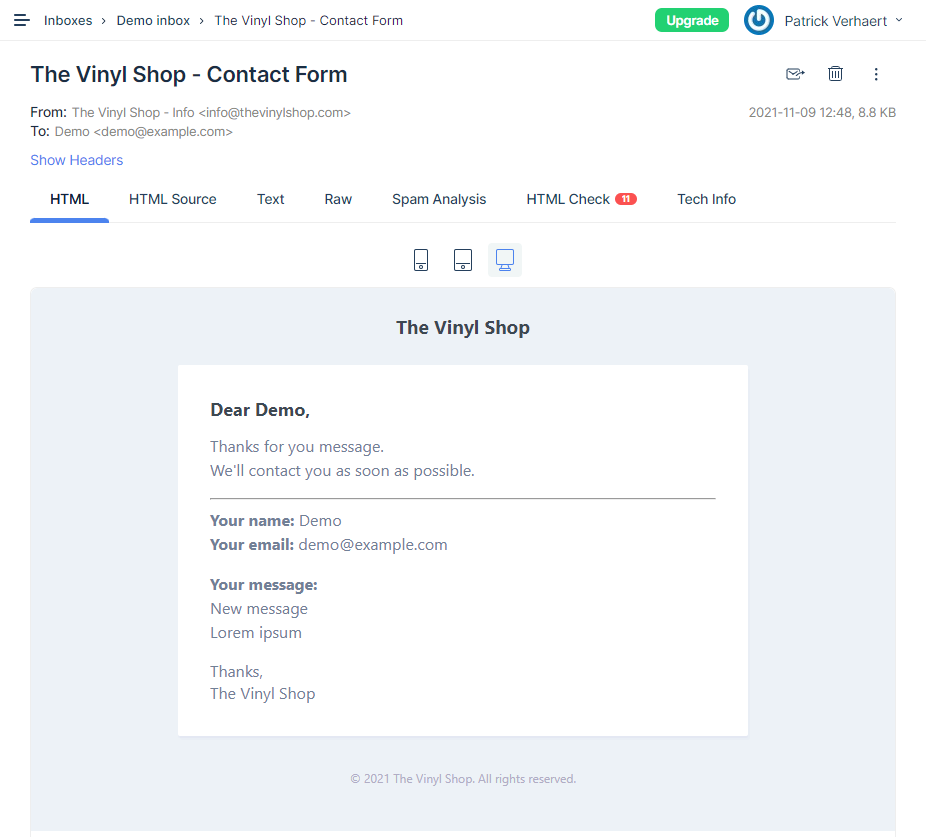
- Open resources/views/email/contact.blade.php and update the template
@component('mail::message')
# Dear {{ $request->name }},
Thanks for you message.<br>
We'll contact you as soon as possible.

<hr>
<p>
<b>Your name:</b> {{ $request->name }}<br>
<b>Your email:</b> {{ $request->email }}
</p>
<p>
<b>Your message:</b><br>{!! nl2br($request->message) !!}
</p>
Thanks,<br>
{{ env('APP_NAME') }}
@endcomponent
2
3
4
5
6
7
8
9
10
11
12
13
14
15
16
WARNING
Don't reformat (or use tabs inside) the mail template: the code inside the following example ruins the layout of your email!
@component('mail::message')
    # Dear {{ $request->name }},
    Thanks for you message.<br>
    We'll contact you as soon as possible.
    ...
@endcomponent
2
3
4
5
6
Extra features
- Check Laravel's mail documentation to discover extra mail features (e.g. add attachments, change the default mailable template (
@component('mail::message')), use a HTML-based or plain text mail template, ...)
Better UX
- To inform the user that a form input field is required, we put a red asterisk after the corresponding label
- Because we want to do this for all forms in the site, it's best to use JavaScript for it
- Open resources/js/app.js and add the following code to the page
require('./bootstrap');

// Make 'VinylShop' accessible inside the HTML pages
import VinylShop from "./vinylShop";
window.VinylShop = VinylShop;
// Run the hello() function
VinylShop.hello();

$('[required]').each(function () {
  $(this).closest('.form-group')
          .find('label')
          .append('<sup class="text-danger mx-1">*</sup>');
});
2
3
4
5
6
7
8
9
10
11
12
13
EXERCISE 1: Add a contact field to the form
- Add a dropdown list to the form in order to choose a specific contact
- The list contains four options: Select a contact (
value=""), Info, Billing and Support - This is a required field, so add it to your validation
- Depending on the choice of the user, the from (and carbon copy) address equals info@thevinylshop.com, billing@thevinylshop.com or support@thevinylshop.com. Also the names corresponding to these addresses ('The Vinyl Shop - Info', 'The Vinyl Shop - Billing', 'The Vinyl Shop - Support') should be adjusted.
EXERCISE 2: Hide the dismiss button on the alert
- The dismiss button 'x' at the top right of the (success) alert is irrelevant for this page
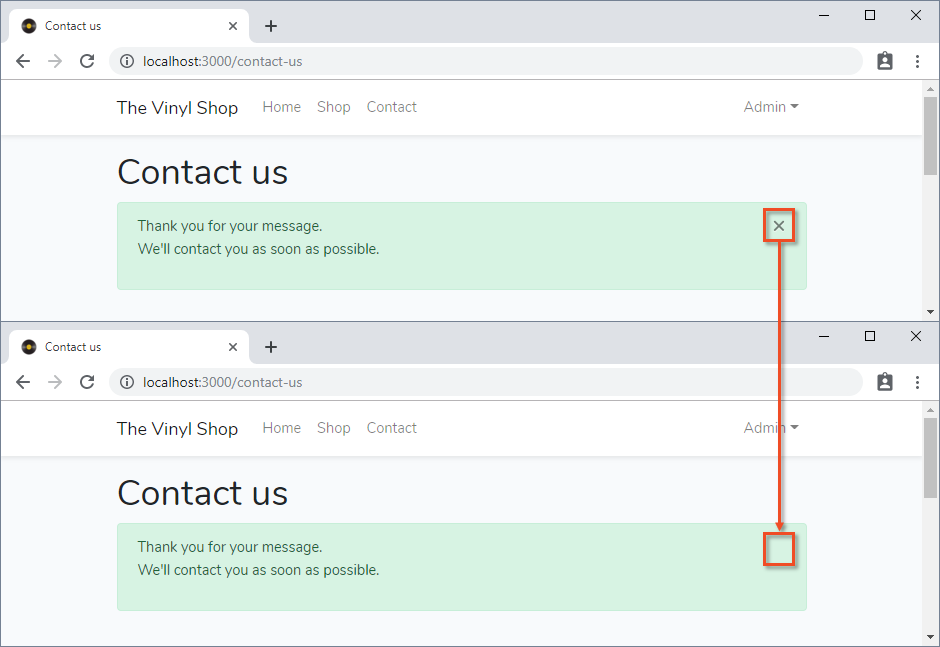
- Write some embedded CSS on this page to automatically hide this dismiss button
Global novalidate
- Don't forget to remove the
novalidateattribute from theformtag for production! - A better option is to add the
novalidateattribute automatically to theformtag, but only in debug mode- Add, after
@yield('script_after'), a new script to resources/views/layouts/template.blade.php - If the variable
APP_DEBUGin the .env file istrue, then add the attributenovalidateto everyformtag in the site
- Add, after
@include('shared.footer')
<script src="{{ mix('js/app.js') }}"></script>
@yield('script_after')
@if(env('APP_DEBUG'))
    <script>
        $('form').attr('novalidate', 'true');
    </script>
@endif
2
3
4
5
6
7
8