User: order confirmation
- Until now, the user only has a visual confirmation of his/her order (at the time of ordering)
- Maybe it's also interesting to send him/her, and all website administrators, an email with the order
- As a bonus, the administrator will receive a WhatsApp message with every new order
Preparation
- Open the
HistoryControllerin the folder app/Http/Controllers/User - In order not to overload the
checkout()method, we are going to add two private methodsconfirmEmail()andconfirmWhatsApp()to the controller - Call both methods just before redirecting to the history page
public function checkout()
{
    ...
    // Redirect to the history page
    $message = 'Thank you for your order.<br>The records will be delivered as soon as possible.';
    ...

    // Send email confirmation
    $this->confirmEmail();
    // Send WhatsApp confirmation
    $this->confirmWhatsApp();

    session()->flash('success', $message);
    return redirect('/user/history');
}

private function confirmEmail()
{
    //
}

private function confirmWhatsApp()
{
    //
}
1
2
3
4
5
6
7
8
9
10
11
12
13
14
15
16
17
18
19
20
21
22
23
24
25
2
3
4
5
6
7
8
9
10
11
12
13
14
15
16
17
18
19
20
21
22
23
24
25
TIP
To quickly test this exercise, it is advised to comment all save() and the Cart::empty() statements in the checkout() method.
By doing so, you don't place a new order (the database is not updated) every time you click the checkout button.
Email confirmation
- We inform the user and all administrators with a detailed email about the order
Create mailable
- To create a new Markdown mailable class
OrderMailwith a Markdown Blade template email/order.blade.php, use the command
php artisan make:mail OrderMail --markdown email.order - Send an email via the
HistoryController- Create an email message
$message, containing an unordered list of all the records in the cart - Make a new instance
$emailof theOrderMailmailable class with the$messageas a parameter - Get all admins from the users table and add them to the
cc()method- Laravel automatically finds the
nameandemailof all the$admins
- Laravel automatically finds the
- Add the recipient (the
Auth::user()) using theto()method (on theMailfacade)- Laravel automatically finds the
nameandemailof the authorized user
- Laravel automatically finds the
- Send the mail using the
send()method with$emailas parameter
- Create an email message
private function confirmEmail()
{
    // construct the mail message
    $message = '<p>Thank you for your order.<br>The records will be delivered as soon as possible.</p>';
    $message .= '<ul>';
    foreach (Cart::getRecords() as $record) {
        $message .= "<li>{$record['qty']} x {$record['artist']} - {$record['title']}</li>";
    }
    $message .= '</ul>';

    // Get all admins
    $admins = User::where('admin', true)->select('name', 'email')->get();

    $email = new OrderMail($message);
    Mail::to(Auth::user())
        ->cc($admins)
        ->send($email);
}
1
2
3
4
5
6
7
8
9
10
11
12
13
14
15
16
17
18
2
3
4
5
6
7
8
9
10
11
12
13
14
15
16
17
18
- Open the mailable app/Mail/OrderMail.php
- Make a new
publicproperty (e.g.$request) - Get the message through the constructor and bind it to the
$requestproperty- As this
$requestproperty is public, it will be available in the mail template
- As this
- Inside the
build()method- The path to the mail template is used as a parameter of the
markdown()method - Add the
fromaddresses from the environment variables - Add a subject to the mailable
- The path to the mail template is used as a parameter of the
class OrderMail extends Mailable
{
    use Queueable, SerializesModels;

    public $request;

    /** Create a new message instance. ...*/
    public function __construct($request)
    {
        $this->request = $request;
    }

    /** Build the message. ...*/
    public function build()
    {
      return $this->from(env('MAIL_FROM_ADDRESS'), env('MAIL_FROM_NAME'))
          ->subject('Your Vinyl Shop Order')
          ->markdown('email.order');
    }
}
1
2
3
4
5
6
7
8
9
10
11
12
13
14
15
16
17
18
19
20
2
3
4
5
6
7
8
9
10
11
12
13
14
15
16
17
18
19
20
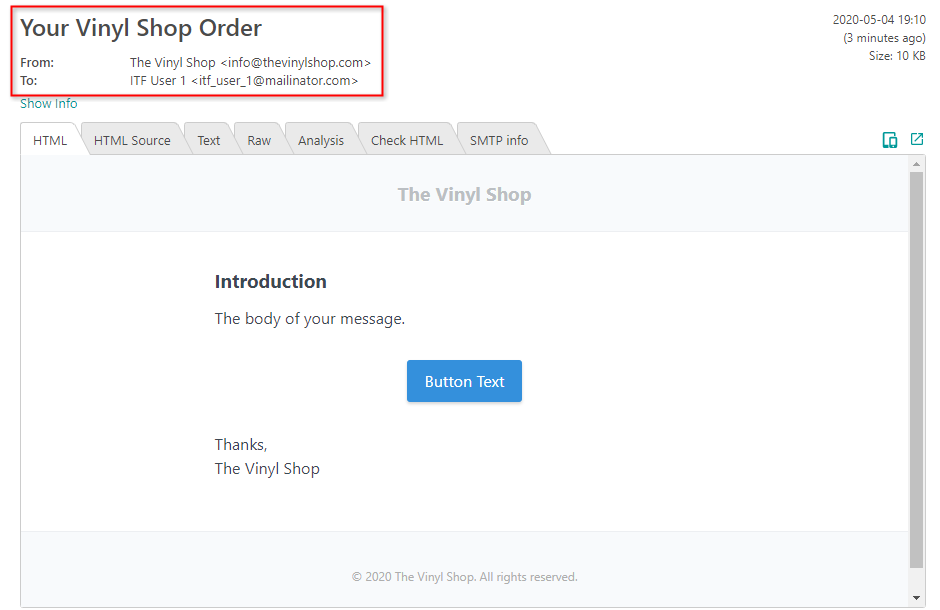
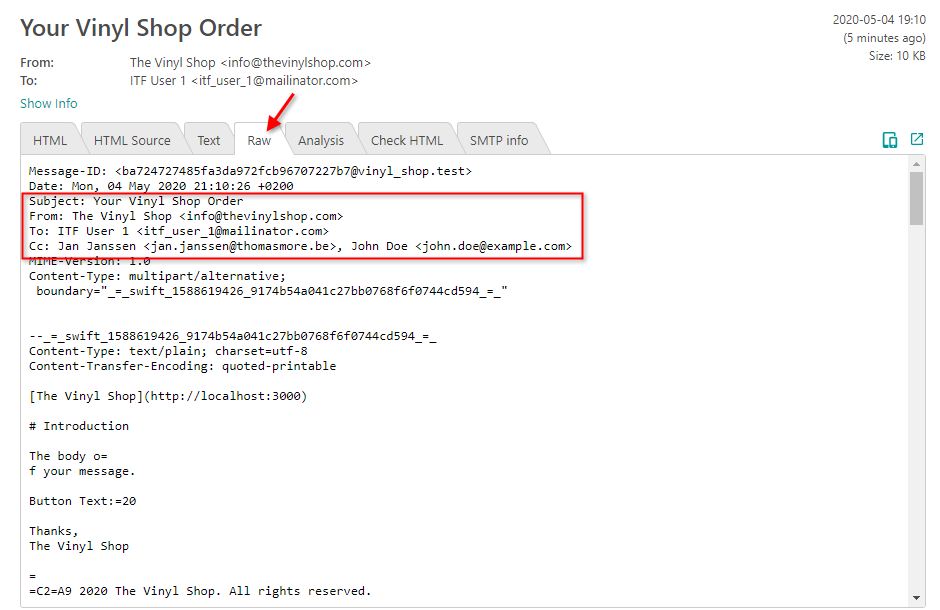
- Example
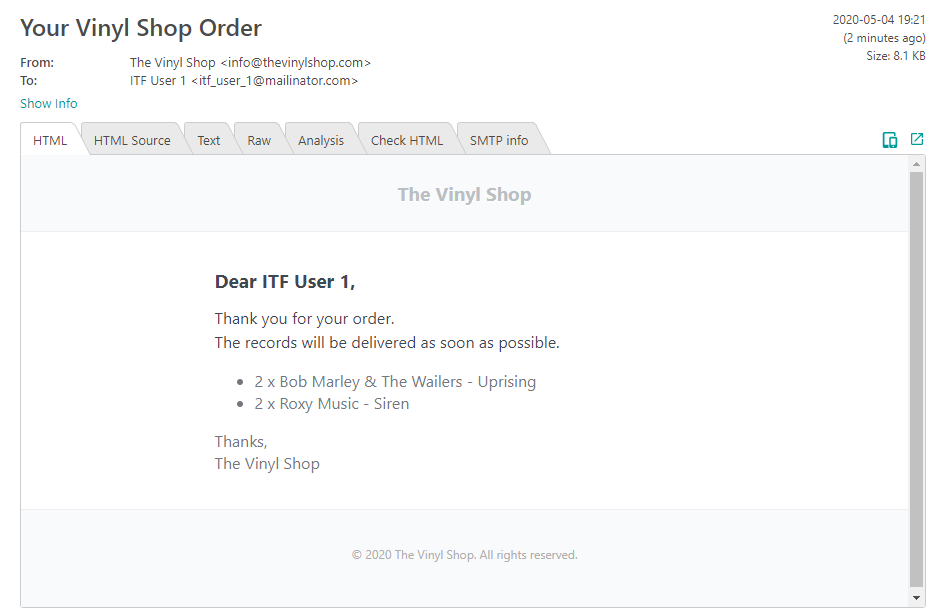
- ITF User 1 makes an order of 2 x Bob Marley & The Wailers - Uprising and 2 x Roxy Music - Siren
- There are two admins in the database (Jan Janssen and John Doe)
- In the .env file,
MAIL_FROM_ADDRESS = info@thevinylshop.comandMAIL_FROM_NAME = "The Vinyl Shop"
Update the mail template
- Open resources/views/email/order.blade.php, update the template and checkout again
@component('mail::message')
# Dear {{ Auth::user()->name }},

{!! $request !!}

Thanks,<br>
{{ config('app.name') }}
@endcomponent
1
2
3
4
5
6
7
8
2
3
4
5
6
7
8
WhatsApp confirmation with Twilio (optional)
- We use Twilio for this example
- We use a free account with relatively few options
- This example is a good starting point if you switch to the paid version (with much more possibilities)
Prerequisites
- Install the Twilio PHP SDK with composer:
composer require twilio/sdk - Create a free Twilio account
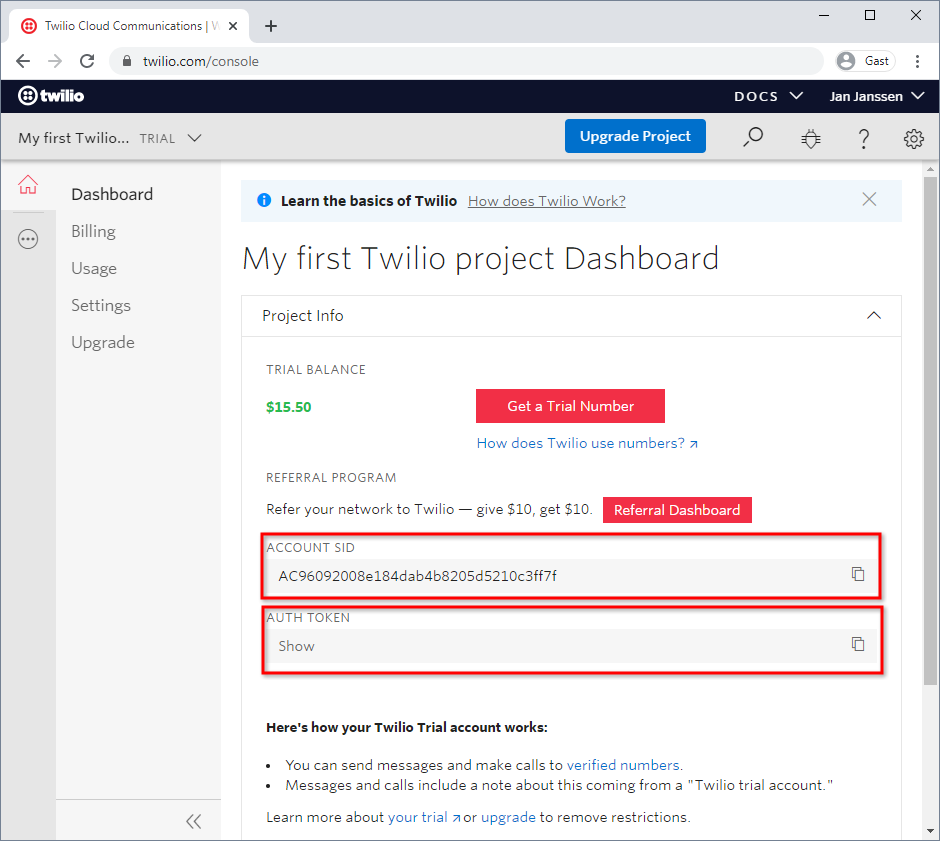
- Go to your Twilio dashboard and copy your ACCOUNT SID and AUTH TOKEN which will be used for authenticating your requests with the Twilio SDK
- Open up your .env file and add the following variables
TWILIO_AUTH_SID=xxxxxxxxxxxxxxxxxxxxxxxxxx      # your ACCOUNT SID
TWILIO_AUTH_TOKEN=xxxxxxxxxxxxxxxxxxxxxxxx      # your AUTH TOKEN
1
2
2
Setting up the WhatsApp Sandbox
- Before you can start sending and receiving messages using the Twilio WhatsApp API in production, you must get a WhatsApp Approved Twilio Number
- To get started in a development setting, we can use the Twilio WhatsApp Sandbox, as indicated on the WhatsApp section of your Twilio dashboard
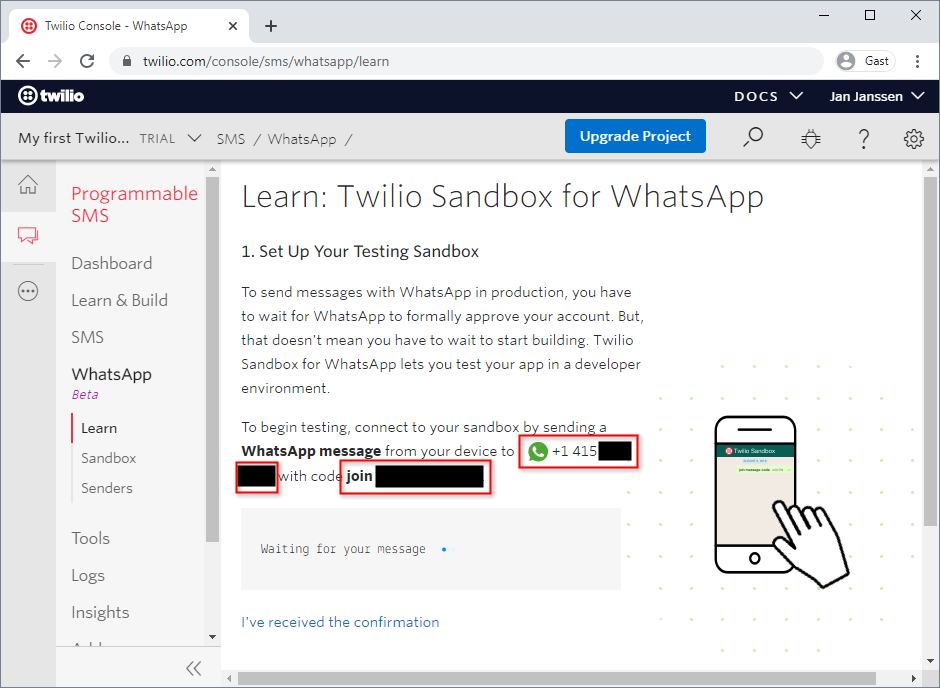
- Add the WhatsApp phone number and your personal phone number to the .env file
- Format: + sign, followed by the land code and a (ten or nine digit) phone number (without spaces!)
TWILIO_AUTH_SID=xxxxxxxxxxxxxxxxxxxxxxxxxx      # your ACCOUNT SID
TWILIO_AUTH_TOKEN=xxxxxxxxxxxxxxxxxxxxxxxx      # your AUTH TOKEN
TWILIO_WHATSAPP_FROM=+1xxxxxxxxxx               # your WhatsApp sandbox phone number
TWILIO_WHATSAPP_TO=+32xxxxxxxxx                 # your personal phone number
1
2
3
4
2
3
4
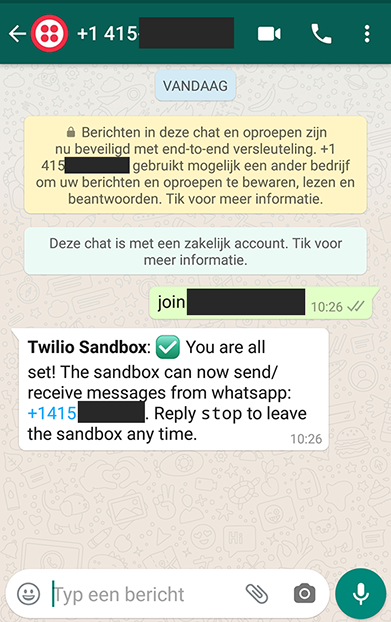
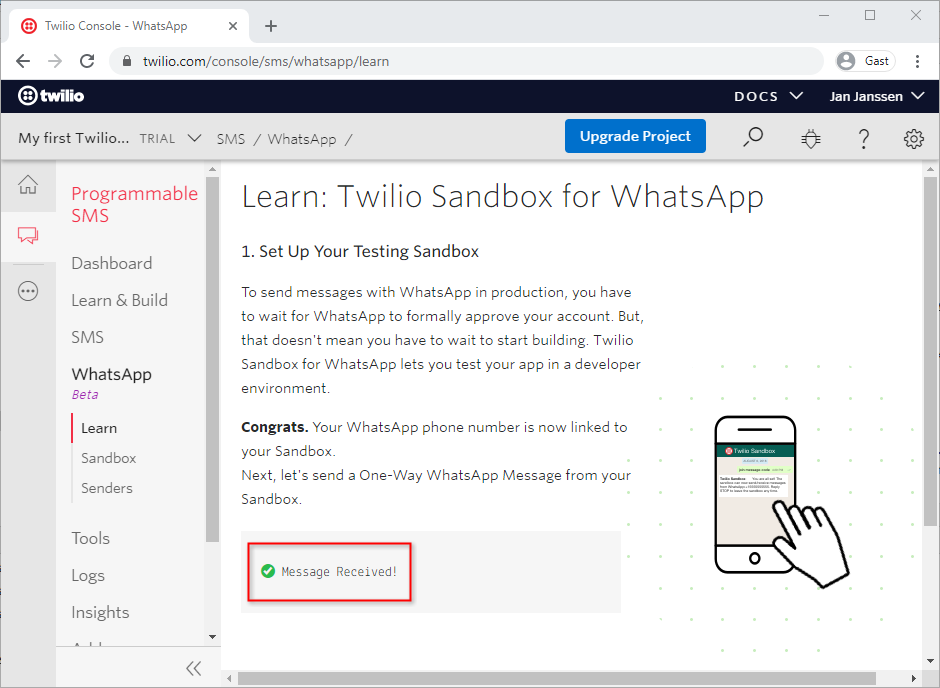
- Activate the Twilio Sandbox
- Open the browser of your mobile device
- Type
https://api.whatsapp.com/send?phone=+1xxxxxxxxxxin the address bar, wherephonecontains the number you got from Twilio - Send the message (the code)
join <your sandbox keyword>
Update the controller
REMARK
- The (free) WhatsApp Sandbox is limited to three predefined templates to choose from
Your {{1}} code is {{2}}
Your {{1}} appointment is coming up on {{2}}
Your {{1}} order of {{2}} has shipped and should be delivered on {{3}}. Details : {{4}}
1
2
3
2
3
- The third template is the closest to what we want to send
- The first three placeholders of the template are irrelevant, but we have to fill them in
- In the fourth placeholder` we list the last order placed
- Update the
confirmWhatsApp()method inHistoryController- Get your credentials from the .env file
- Construct the fourth placeholder for the template
- Send the WhatsApp message
- Check out the Twilio WhatsApp documentation for additional information
private function confirmWhatsApp()
{
    // get credentials from the .env file
    $id = env('TWILIO_AUTH_SID');
    $token = env('TWILIO_AUTH_TOKEN');
    $to = env('TWILIO_WHATSAPP_TO');
    $from = env('TWILIO_WHATSAPP_FROM');

    // the message for the fourth placeholder of the WhatsApp order template
    $details = "*" . Auth::user()->name . "* has ordered:";
    foreach (Cart::getRecords() as $record) {
        $details .= " {$record['qty']} x {$record['artist']} - {$record['title']},";
    }

    // construct the order template for the sandbox:
    // Your {{1}} order of {{2}} has shipped and should be delivered on {{3}}. Details: {{4}}
    $message = "Your *Vinyl Shop* order of *today* has shipped and should be delivered on *your address*. Details: $details";

    // send WhatsApp message to your phone
    $whatsApp = new Client($sid, $token);
    $whatsApp->messages->create(
        "whatsapp:$to", [
            'from' => "whatsapp:$from",
            'body' => $message
        ]
    );
}
1
2
3
4
5
6
7
8
9
10
11
12
13
14
15
16
17
18
19
20
21
22
23
24
25
26
27
2
3
4
5
6
7
8
9
10
11
12
13
14
15
16
17
18
19
20
21
22
23
24
25
26
27
- Place a new order to test everything
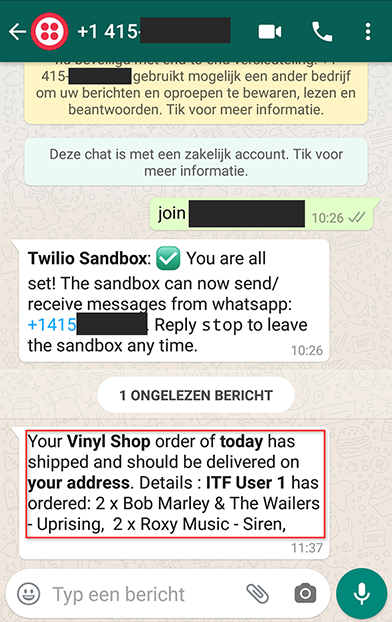
REMARK
- If something went wrong with sending this message, you will find a detailed description in the Twilio log files
EXERCISE: Refactor the WhatsApp confirmation (optional)
- If you look carefully at the WhatsApp message, you see a comma
,at the end of the message- Replace this comma
,with a period.
- Replace this comma
- If you want to re-use the WhatsApp method (e.g. if someone registers), it is best to move it to a helper function
- Make a new helper class app/Helpers/Twilioclient.php
- Add an alias to the
aliasesarray in config/app.php, and update the IDE helper - Move the code (that sends the WhatsApp message) to the method
whatsApp($message) - Use the helper everywhere you need it with the code
Twilioclient::whatsApp($message) - If you have a paid subscription with Twilio, you can also send an SMS, which needs a second, similar method (
Twilioclient::sms($message))
Uncomment the necessary statements
- Don't forget to uncomment all
save()and theCart::empty()statements in thecheckout()method! - Test the full order cycle